
DIY tips to upgrade your fireplace mantel
December 1, 2022
Gathering around a warm, glowing fireplace is a source of endless, cozy comfort. But it’s hard to access that feeling if your fireplace is a dated eyesore or just doesn’t fit your aesthetic.
Enjoy snuggling up next to the fireplace of your dreams – and stay on budget – with these tips and ideas for a do-it-yourself fireplace makeover you’ll love.
Replacing the firebox? Choose the right one
Although nothing can beat the scent of a natural wood-burning fireplace, they can be complicated to add. If your existing one is non-functional or too much work to maintain, you may consider replacing it with a gas or electric firebox.
A gas fireplace will likely be more expensive than electric and requires a natural gas or propane line to the outside, but it gives you flickering flames and can generate lots of heat without a complicated chimney addition. Electric fireplaces, usually ventless, are more economical and easier to install, but you will have to pass on the genuine flames and some heat output.
Before you do any demo or install, be sure your local building codes will allow the update, and check if you need a permit or a licensed gasfitter and electrician.
Updating your mantel? Draw the eye
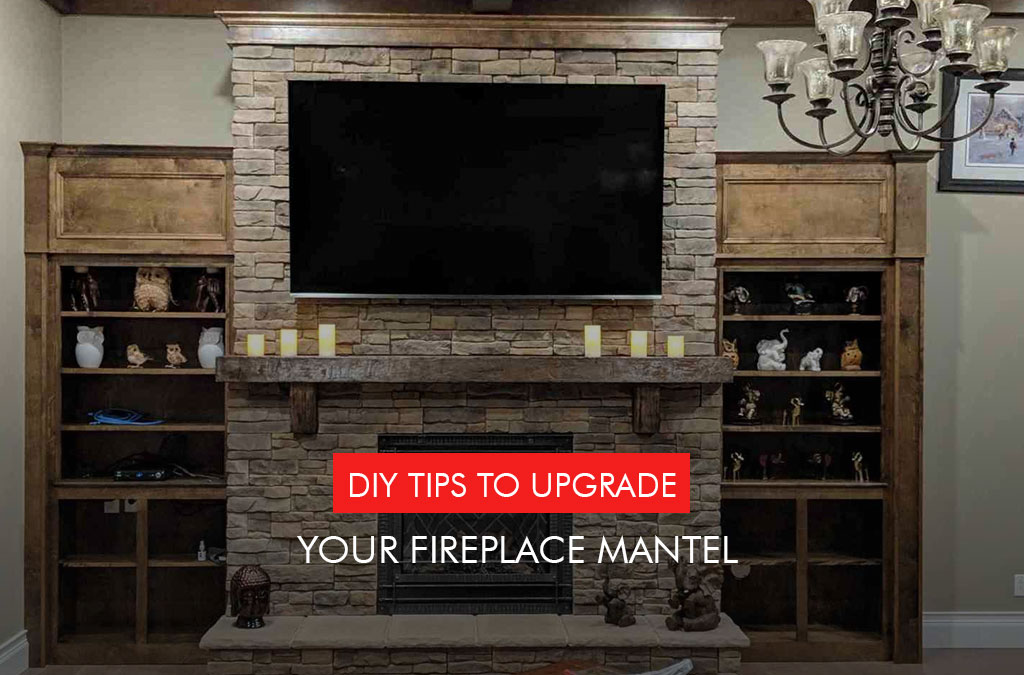
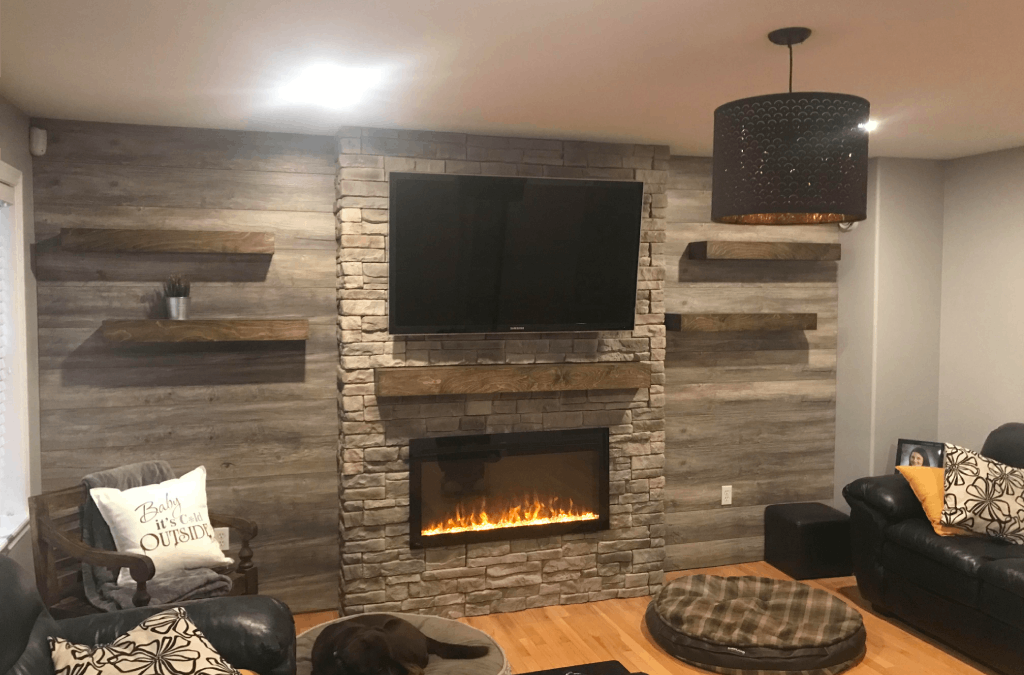
The best mantels provide the perfect balance and contrast to the fireplace surround. They guide the eye to highlight the fire itself or a television up top and emphasize the overall feature. Consider a floating wooden beam atop a stone surround for a trendy rustic look. Or, opt for a traditional curved mantel with legs or corbels on either side of the flames. Reclaimed wood adds environmental and economical savings.
Mantels also serve to absorb heat and protect the wall above the fire, so don’t skip one entirely – especially if you’re planning to install a television above the firebox. The average height of a mantel is about four and half feet tall.
Fire protection recommendations suggest the mantel go 12 inches above the firebox itself, but otherwise feel free to get creative with height or extra shelving – as long as the overall effect is balanced to the size of the fireplace, the wall and the room.
Adding storage? Remember balance
Incorporating cupboards or shelves on either side of your fireplace can add visual interest to the room and help balance out a large fireplace installation – not to mention adding a practical and functional place for your things.
For DIY storage options, you can build your own custom cases, adapt prefabricated built-ins or repurpose bookshelves or kitchen cabinets. Cut discreet corner holes for cords and cables to escape near their outlets so you can minimize mess and tangles. And consider including doors below and shelving above to keep some items out of sight and others on display. Remember to caulk joints prior to painting.
Replacing the hearth? Don’t forget style options
The floor in front of the fire, known as the hearth, plays an important role for looks and safety, too. Safeguarding against errant sparks and heat, the hearth may have a small footprint that’s flush with the rest of the flooring, a raised box shape or even hang out from the wall in a cantilever.
Bold tile or stone hearths can be a refreshing look at the foot of the grate and help bring attention to the beautiful blaze. Look for soft and subtle colours for a more coastal look or choose a hit of colour or pattern for a more boho design you’ll admire every time you watch the flickering flames.
One of the simplest and most economical DIY updates for the area in front of the fireplace is to add a concrete skim coat. It’s especially effective over a pebbly 1980s exposed aggregate hearth. You simply clean the surface well, apply the concrete like you’re icing a cake and seal it once dry.
Refacing the surround? Use DIY stone veneer
The update with the largest impact – refacing the area surrounding the firebox – doesn’t have to be a major undertaking. But adding whitewash or paint is a quick fix that cannot improve the dated shape of your fireplace, nor guarantee longevity in terms of looks. Instead, consider stone as a timeless choice that adds instant rustic cottage-core cozy, or sleek 21st century style, or pretty much any style you’re craving.
DIY-friendly Fusion Stone makes creating a stone-surround fireplace an entirely manageable project. You simply apply a plywood or OSB substrate to the surface, and then use the stainless-steel screws and starter strips provided with the product to install the stones. That’s it. Not messing about with mortar means you have one less thing to purchase or apply correctly. No mortar also means no drying time, so you can complete the project much more quickly.
Fully fireproof and backed by a lifetime warranty, Fusion Stone makes for an ideal way to get a gorgeous fireplace you’ll want to spend time around. Check out the videos for more how-to help.
